Installing a heavy duty hose pump is a significant undertaking that requires careful planning, proper knowledge, and attention to detail. As a reputable heavy duty hose pump supplier, I have been involved in numerous installations, guiding customers through the process and ensuring everything goes smoothly. In this blog, I’ll share a comprehensive guide on how to install a heavy duty hose pump, from preparation to commissioning. Heavy Duty Hose Pump

Pre – installation Preparation
Before you even start unpacking the hose pump, it’s essential to carry out some preparatory work. This step will save you time and prevent potential issues during the installation process.
Site Assessment
First, select a suitable location for the pump. The site should be well – ventilated to prevent overheating, as heavy duty hose pumps can generate a considerable amount of heat during operation. The area should also be dry to avoid water damage to the pump components. Additionally, ensure that the floor is level and can support the weight of the pump. Uneven surfaces can lead to misalignment and premature wear of the pump parts.
Measure the available space to make sure the pump can fit comfortably. You need to account for not only the physical dimensions of the pump itself but also the space required for maintenance, such as access to the hoses, couplings, and motor. There should be enough room around the pump for technicians to move freely and perform tasks like hose replacement or motor servicing.
Electrical and Plumbing Requirements
Check the electrical supply at the installation site. Verify that the voltage and frequency match the pump’s specifications. Incorrect electrical supply can damage the pump motor or cause it to operate inefficiently. If necessary, hire a qualified electrician to install the appropriate electrical connections, including grounding to ensure safety.
For the plumbing side, determine the correct pipe sizes and materials for the inlet and outlet connections. The pipes must be able to withstand the pressure and flow rate of the pumped fluid. Make sure the pipes are clean and free from debris before connecting them to the pump. You may need to install valves and filters in the piping system to control the flow and protect the pump from contaminants.
Gather Tools and Materials
Assemble all the necessary tools for the installation, such as wrenches, screwdrivers, pipe cutters, and sealants. You may also need lifting equipment, depending on the size and weight of the pump. Ensure that the lifting equipment is rated to handle the pump’s weight safely.
In addition to tools, collect all the required materials, including hoses, couplings, gaskets, and fasteners. Check that these materials are of high quality and compatible with the pump and the fluid being pumped.
Unpacking and Inspection
Once the site is ready and you have all the necessary tools and materials, it’s time to unpack the pump. Carefully remove the pump from its packaging and inspect it for any visible damage during transit. Look for cracks in the housing, bent shafts, or damaged hoses. If you find any issues, contact the manufacturer or our support team immediately.
During the inspection, also check that all the components are included in the package. Refer to the pump’s manual for a list of standard components. If any parts are missing, we will be able to help you source the correct replacements quickly.
Mounting the Pump
Mounting is a critical step in the installation process, as it affects the pump’s stability and performance.
Placement on the Base
Position the pump on the pre – selected and prepared base. Use a level to ensure the pump is perfectly horizontal. Minor misalignments can cause excessive vibration and noise during operation, which may in turn lead to premature wear of the pump parts.
Securing the Pump
Use the appropriate fasteners to secure the pump to the base. The fasteners should be tightened to the manufacturer’s recommended torque values. Over – tightening can damage the pump housing, while under – tightening can cause the pump to shift during operation.
Plumbing Connections
Inlet and Outlet
Connect the inlet and outlet pipes to the pump using the provided couplings or adapters. Make sure the connections are tight and leak – free. Apply a suitable sealant to the threads of the connections to prevent fluid leakage.
When connecting the hoses, ensure that they are not kinked or twisted. Kinked hoses can restrict the flow of the fluid and reduce the pump’s efficiency. If the hoses are too long, they may require additional support to prevent sagging.
Priming System (if applicable)
Some heavy duty hose pumps require a priming system. Follow the manufacturer’s instructions to install and connect the priming system correctly. The priming system ensures that the pump can start pumping fluid effectively, especially when the pump is located above the fluid source.
Electrical Connections
Motor Wiring
If the pump is electrically driven, connect the motor to the electrical supply. This should only be done by a qualified electrician. The wiring must be done according to the electrical code and the pump’s wiring diagram. Ensure that all connections are secure and properly insulated to prevent electrical hazards.
Control Panel (if applicable)
If the pump comes with a control panel, install it in a convenient location. Connect the control panel to the pump and the electrical supply. The control panel allows you to start, stop, and monitor the pump’s operation. Follow the manufacturer’s instructions for programming and setting up the control panel.
Testing and Commissioning
Initial Checks
Before starting the pump, perform a final visual inspection of all the connections. Check for any loose bolts, hoses that may have become dislodged, or electrical connections that need tightening.
Fill the inlet pipe and the pump chamber with the fluid to be pumped. This helps to prime the pump and ensure a smooth start.
Start – up
Switch on the power to the pump and start it up. Observe the pump’s operation closely. Listen for any abnormal noises, such as grinding or rattling, which may indicate a problem. Check for any leaks at the connections.
Monitor the pressure and flow rate of the pump. Compare the actual readings with the pump’s specifications. If there are significant discrepancies, stop the pump immediately and troubleshoot the issue.
Fine – tuning
Based on the initial start – up results, you may need to make some adjustments. This could include adjusting the pressure relief valve, changing the speed of the motor, or tightening the hose clamps. Make sure to document all the adjustments made for future reference.
Maintenance Considerations
Even after successful installation and commissioning, regular maintenance is crucial to ensure the long – term performance of the heavy duty hose pump.
Hose Replacement
The hoses in a hose pump are subject to wear and need to be replaced at regular intervals. The frequency of replacement depends on factors such as the type of fluid being pumped, the operating pressure, and the temperature. Follow the manufacturer’s recommendations for hose replacement to prevent pump failure.
Lubrication (if applicable)
Some components of the hose pump may require lubrication. Use the recommended lubricant and follow the lubrication schedule provided in the manual.
Inspection and Cleaning
Regularly inspect the pump for any signs of wear, damage, or corrosion. Clean the pump and its components to remove any dirt or debris that may affect its performance.
Conclusion
Installing a heavy duty hose pump is a complex process, but by following these steps and working with a reliable supplier like us, you can ensure a successful installation. A properly installed and maintained heavy duty hose pump will provide years of reliable service.
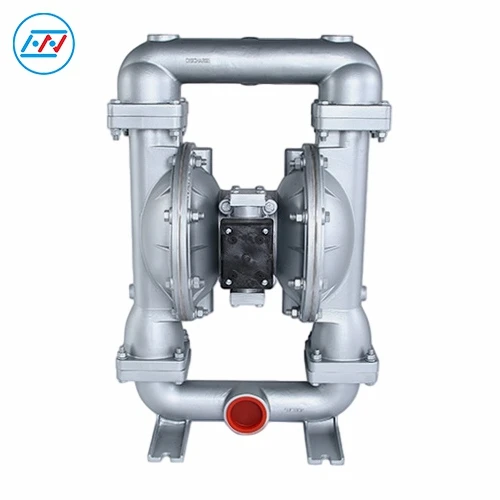
Pneumatic Diaphragm Pump If you are interested in purchasing a heavy duty hose pump or need further assistance with the installation process, don’t hesitate to contact us. We have a team of experts ready to answer your questions and guide you through the purchasing and installation process.
References
- Heavy Duty Hose Pump Manufacturer’s Installation Manual
- Industry Standards for Pump Installation and Maintenance
Shaanxi Hono Electronic Technology Co., Ltd.
Address: 4C-1102, Financial Port, No. 1 West 1st Road, Fengjing Avenue, Fengdong New Town, Xi’an, Shaanxi, China
E-mail: juicy@honopump.com
WebSite: https://www.honopump.com/
