If you’ve ever walked through a farmers’ market in late summer, when bunches of basil, rosemary, oregano, and mint hang from vendor stalls like tiny, fragrant brooms, you know herbs are as much about their bright, earthy scent as their flavor. But if you’re a herb farmer, a food processor, or even a small-batch spice brand, you’ve probably run into the same problem: fresh herbs are highly perishable—they wilt in a week, and if you let them go bad, all that time, water, and care that went into growing them is gone. That’s where drying comes in, and for anyone looking to do it efficiently, consistently, and at scale, a tunnel dryer is the game-changer. Tunnel Dryer
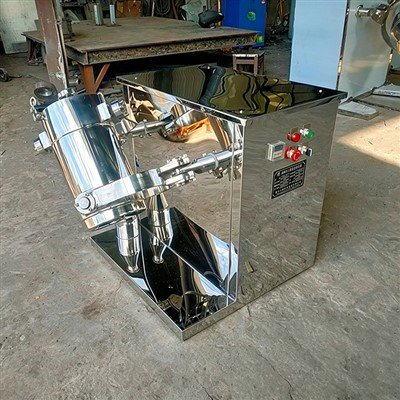
I’m the founder of a tunnel dryer company, and every week I get calls from herb producers asking the same thing: “How do I actually use this machine right? I’ve tried drying with it, but half my batch is moldy, it’s lost all its color, and the scent is gone.” It makes sense—drying herbs isn’t just about cranking up the heat and waiting. There’s a science to it, and a lot of small mistakes that can ruin a perfectly good harvest. Today, I’m walking you through exactly how to dry herbs with a tunnel dryer, using the methods we’ve refined with our own herb processing clients over the last decade. No vague tips, no guesswork—just practical, proven steps that actually work, whether you’re drying a 50-pound batch of homegrown basil or 10,000 pounds of mint for a national spice brand.
First, let’s talk about why tunnel dryers are so perfect for herbs, because a lot of people ask why not use a regular convection oven or a dehydrator shelf? Shelf dehydrators work for small batches, but they’re slow, inconsistent—one shelf might be too hot, one too cool, and if you’re processing 2,000 pounds of oregano a week, you don’t have time to baby every tray. Conventional batch dryers often have hot spots too, or require loading and unloading constantly, which adds labor and increases the risk of contamination. Tunnel dryers solve that by creating a continuous airflow path: you load trays of herbs at one end, and they move slowly through a controlled environment of temperature, humidity, and air speed, exiting as dry, uniform herbs at the other end. It’s scalable, consistent, and cuts drying time in half compared to most other methods—critical for herbs, which can easily lose their volatile oils (the stuff that makes them taste and smell good) if dried too fast or too slow.
Before we get into the step-by-step process, let’s cover the non-negotiables that make or break herb drying, because if you skip these, even the best tunnel dryer won’t save your batch. First, pre-treatment. I know a lot of people load fresh herbs straight into the tunnel, but that’s a mistake. Fresh herbs have a lot of surface moisture, especially if they were washed, and if you dump them straight into the dryer, that surface water will cause the outer leaves to cook before the inner moisture evaporates, leading to mold and discoloration. The pre-treatment we recommend for most herbs is a quick blanch, but not the kind you do for veggies. For herbs, blanching in hot water (120°F to 140°F, not boiling—boiling will leach out the oils) for 30 to 60 seconds, followed by a quick ice bath to stop the cooking, and a light spin to remove excess surface moisture. This is especially important for leafy herbs like basil, spinach, or mint, which have delicate leaves and high moisture content. For woody herbs like rosemary, thyme, or oregano, you can skip the blanch if you’re working with mature, low-moisture stems, but a quick rinse to remove dirt and debris is still a must.
Second, tray preparation. This is another step people overlook. You can’t just dump a big pile of herbs on a tray and call it good. For tunnel drying, you want to spread the herbs in a uniform, single layer, no thicker than ½ inch. Any thicker, and the air won’t circulate through the leaves, leaving the center of the pile damp. Also, make sure the trays are lined with food-grade mesh—not solid sheets. Solid sheets trap moisture and cause hot spots. The mesh holes should be small enough that herbs don’t fall through, but large enough to let air flow freely. If you’re drying leafy herbs, gently pat them with a paper towel after spreading to remove any excess surface moisture that the spin didn’t get off.
Now, let’s get into the actual drying process. Every tunnel dryer is a little different, so I’m going to give you the baseline settings that work for 90% of herbs, and then adjust based on the type of herb. The first thing to set is air speed. This is critical for herbs, because you don’t want air so fast that it blows the leaves off the trays, but fast enough to carry moisture away from the surface. For most herbs, a linear air speed of 1 to 1.5 meters per second at the tray level works. If you’re drying very delicate herbs like dill or cilantro, stick to the lower end—0.8 to 1 m/s—because higher speed can damage the leaves. For woody, thicker herbs like rosemary or sage, you can go up to 1.5 m/s.
Next, temperature. Here’s the big mistake I see people making: cranking the temperature as high as possible to dry faster. That’s a recipe for disaster. Herbs have volatile essential oils that start to break down at temperatures above 140°F, and chlorophyll (the stuff that makes them green) starts to degrade above 120°F. So the ideal drying temperature for almost all herbs is between 95°F and 120°F. For leafy, delicate herbs like basil, mint, or cilantro, stick to 95°F to 105°F—any higher and you’ll lose the bright green color and the fresh, sweet scent. For woody herbs, which have tougher stems that take longer to dry, you can go up to 120°F, but only for the final stage of drying—start at 100°F for the first half of the cycle, then bump up to 120°F for the last 20% to finish drying the stems without ruining the leaves.
Humidity is the third setting, and it’s almost as important as temperature. If the air in the tunnel is too humid, it can’t pick up more moisture from the herbs, so drying will take forever, and mold will grow. If it’s too dry, you’ll lose too much of the volatile oils too quickly, leading to a dull, flavorless herb. We recommend keeping the relative humidity in the tunnel between 10% and 15% for most of the drying cycle. For the first stage, when the herbs have a lot of surface moisture, you can let the humidity go up to 20%—that helps the leaves dry evenly without cracking. Once the surface moisture is gone (usually after 1 to 2 hours, depending on the herb), lower the humidity to 10% to finish the drying.
Now, the drying cycle length. This varies by herb. Leafy herbs like basil or mint will take 2 to 3 hours in the tunnel dryer, at the settings we mentioned. Woody herbs like rosemary or thyme will take 4 to 6 hours, because their stems have more moisture. The best way to test if they’re done is to do a manual check, not just rely on the dryer’s timer. Take a few leaves or a small piece of stem, let them cool to room temperature (hot herbs will feel brittle when they’re actually still moist inside), then squeeze them between your fingers. If they crumble easily and there’s no moisture left inside, they’re done. If they bend or feel leathery, they need more time. Don’t over-dry them—over-dried herbs will turn to dust when you touch them, and all the flavor is gone.
Once the herbs are done drying, the next step is the most important for preserving quality: conditioning. A lot of people take the herbs straight out of the tunnel and bag them, but that’s a mistake. Freshly dried herbs have a slightly uneven moisture content—some leaves might be a tiny bit more moist than others, and if you seal them up right away, that leftover moisture will cause mold to grow in the bag. Conditioning takes 12 to 24 hours, and it’s simple: put the dried herbs in a large, food-grade container with a loose lid (so air can circulate), and leave them at room temperature, away from sunlight. Every few hours, shake the container to mix the herbs, so any moisture that’s trapped is evenly distributed. After conditioning, do another moisture test: insert a moisture meter into the middle of the container, and make sure the moisture content is between 8% and 10%. That’s the sweet spot for long-term storage—any higher and mold will grow, any lower and the herbs will lose their flavor quickly.
Wait, let’s talk about two common herb-specific adjustments, because not all herbs are the same. First, basil. It’s one of the most popular herbs, but also one of the easiest to mess up. Basil has very delicate leaves, high chlorophyll content, and volatile oils that break down fast. For basil, we recommend skipping the blanch step—blanching will turn basil leaves brown, instead use a quick rinse and gentle spin to remove excess moisture, then spread the leaves in a single layer no thicker than ¼ inch. Temperature should be 95°F, humidity 10%, and cycle length is 2 hours max. If you go over 105°F, basil will turn black and lose 70% of its scent. Second, rosemary. It’s a woody herb, with thick stems that take longer to dry. For rosemary, you can keep the leaves on the stems until after drying (removing them before drying can make them blow away in the tunnel). The temperature can start at 100°F, then go up to 120°F for the last 2 hours, and cycle length is 5 to 6 hours. The key with rosemary is that you don’t want the leaves to fall off the stems during drying—so make sure the air speed is set to 1.2 m/s, not higher, to keep the leaves intact.
Now, let’s cover some common mistakes we see clients make with tunnel dryers, because even if you follow all the settings, these will ruin your batch. First, overloading the tunnel or the trays. A lot of people want to process as much as possible, so they stack trays high or push too many trays through the tunnel at once. That blocks airflow, so the middle of the load stays damp, leading to mold. Stick to the ½ inch layer rule, and only load as many trays as the tunnel’s design capacity allows. For example, if your tunnel is designed to hold 50 trays at a time, don’t put 55 in—you’ll create a bottleneck in the airflow. Second, not maintaining the dryer regularly. Tunnel dryers have fans, heaters, and humidity controls that need to be checked every month. If a fan is running slower than it should, airflow drops, and drying time doubles. If the heater is producing inconsistent heat, you’ll have hot spots that burn the herbs. We include a free maintenance guide with every tunnel dryer we sell, and we do quarterly check-ins with clients to make sure their equipment is running at peak performance. Third, exposing herbs to sunlight during any stage. Sunlight breaks down volatile oils and chlorophyll, so you should load fresh herbs in shaded areas, dry them in the tunnel (which is usually enclosed, so no sun), and store dried herbs in airtight, dark containers. Even a few hours of sunlight on freshly picked basil will make it taste flat and dull.
I want to share a success story from a client of ours, a small herb farm in Oregon that was growing 10 acres of mint and basil a few years ago. They were using a conventional dehydrator that only processed 500 pounds a week, and half their batch was being rejected by buyers because it was discolored and had lost most of its scent. They bought a small continuous tunnel dryer from us, and after implementing the steps we walked them through—pre-treating, correct settings, conditioning—their batch rejection rate dropped to less than 1%, and their sales went up 40% because their dried herbs were now brighter, more flavorful, and consistent. That’s what a good tunnel dryer can do for your operation, whether you’re a small farm or a large food processor.
If you’re thinking about investing in a tunnel dryer, or if you already have one but are struggling to get the herb quality right, the next step is to talk to someone who knows the equipment and the herb industry. We’ve worked with dozens of herb producers, from small family farms to large spice brands, and we can help you customize the settings and process to fit your specific herbs and production needs. We don’t do generic solutions—every herb operation is different, and your dryer should work for your needs, not the other way around.
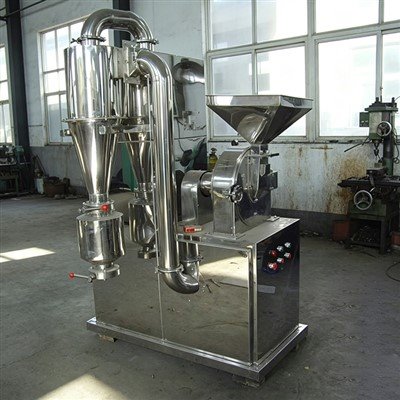
Don’t let your hard-grown herbs go to waste because of poor drying. With the right process, a well-maintained tunnel dryer will help you produce high-quality, consistent dried herbs that keep their flavor, color, and scent for up to a year. If you’re ready to learn more about how a tunnel dryer can work for your herb business, reach out to our team to discuss your requirements and get a personalized solution.
Drying Equipment References
- Food and Agriculture Organization of the United Nations. (2019). Post-Harvest Drying of Herbs and Spices: A Practical Guide.
- U.S. Department of Agriculture. (2021). Commercial Drying of Horticultural Products: Best Practices for Leafy Herbs.
- Zhang, L., et al. (2020). Effect of Drying Parameters on Volatile Oil Retention in Medically Important Herbs. Journal of Food Engineering.
- European Spice Association. (2018). Standard Operating Procedures for Drying and Processing of Culinary Herbs.
Nanjing Huozao Machinery Technology Co., Ltd.
Nanjing Huozao Machinery Technology Co., Ltd. is one of the most professional tunnel dryer manufacturers and suppliers in China, also supports customized service. With abundant experience, we warmly welcome you to buy durable tunnel dryer for sale here from our factory. For price consultation, contact us.
Address: No.2, Kuailu Road, Longtan Street, Qixia District, Nanjing
E-mail: hz@huozaodryer.com
WebSite: https://www.huozaodryer.com/
