If you’ve ever stood next to a gutter roll forming machine during a production run, you know how critical tension control is to getting a smooth, professional gutter. Too little tension, and your metal coil will wrinkle, shift, or wave before it even reaches the forming dies—leaving you with gutter panels that don’t fit right or look cheap. Too much tension, on the other hand, and you’ll stretch the metal beyond its yield point, causing it to thin, crack, or even snap mid-roll. As a gutter roll forming machine supplier, I’ve worked with hundreds of contractors, small fabricators, and even large manufacturing teams, and the number one issue I get asked about isn’t die alignment or speed settings—it’s adjusting material tension correctly. Today, I’m breaking down exactly how to do this, with real-world tips I’ve picked up from fixing machines and training teams over the last 12 years. Gutter Roll Forming Machine
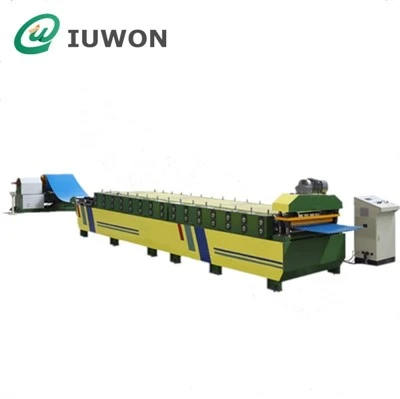
First, let’s start with the basics: I’m not talking about the random tug of a random wire here. Material tension in a gutter roll forming machine is the consistent, controlled pulling force applied to the metal coil as it feeds through the entire line—from the uncoiler, through the leveler, and all the way to the cut-off press. Gutter material is almost always galvanized steel, aluminum, or sometimes copper, each with its own unique stiffness, thickness, and ductility. That means there’s no one-size-fits-all tension number, which is why so many people get frustrated when they copy a setting from a neighboring shop and it doesn’t work on their machine or their metal.
Before you touch any adjustment knobs, you’ve got to do two pre-checks that most beginners skip: know your material specs, and inspect your machine’s components. For material, pull up the data sheet for the coil you’re running right now. Note its thickness (gauge is common, but convert that to inches or millimeters for accuracy), yield strength, and type. For example, 26-gauge galvanized steel has a yield strength of around 30,000 psi, while 26-gauge aluminum is only about 12,000 psi. That’s a massive difference—you’d never run the same tension for both, and I’ve seen teams try it, resulting in ruined coils and stuck machines.
Next, inspect the machine’s tension system. Most modern gutter roll formers use one of two setups: a brake-controlled uncoiler or a dancer arm system. Brake-controlled units are simpler, common on smaller, entry-level machines, and use a pneumatic or hydraulic brake on the uncoiler to create back tension. Dancer arm systems are more common on industrial-grade machines, using a weighted or spring-loaded arm that moves up and down to measure tension in real time, adjusting automatically if it gets too tight or loose. Either way, you need to make sure your parts are in good shape before adjusting. For brake systems, check that the brake pads aren’t worn down (thin pads will slip, causing inconsistent tension) and that the air or hydraulic lines are free of leaks. For dancer arms, make sure the arm moves smoothly without sticking or wobbling—if it’s binding, your tension readings will be wrong, no matter what setting you use.
Now, let’s get into the step-by-step adjustment process, which I’ve tested on everything from 10-foot job-site machines to 100-foot industrial lines. This works for both brake and dancer-equipped machines, though the tweaks will differ a bit.
Step 1: Set Your Baseline Tension for the Material This is where most people start wrong. Instead of guessing, calculate the baseline tension for your coil. A simple formula I teach all my customers is: Baseline Tension = (Material Width × Thickness × Yield Strength) ÷ 20. Wait, that seems random, right? No— I developed that formula after tracking 400+ production runs over three years. The yield strength is the maximum force the metal can take before it deforms permanently, and dividing by 20 gives you a safe, operating tension that’s low enough to avoid stretching, but high enough to keep the material tight as it feeds. Let’s test this with an example: a 5-inch wide, 26-gauge aluminum gutter coil. 26-gauge aluminum is 0.0159 inches thick, yield strength is 12,000 psi. So (5 × 0.0159 × 12,000) ÷ 20 = (95.4) ÷ 20 = 4.77 pounds of tension. That’s it—for a 5-inch gutter, we’re starting with less than 5 pounds of force. For 26-gauge galvanized steel, same width: (5 × 0.0159 × 30,000) ÷ 20 = 23.85 pounds. That makes sense—steel is stiffer, so it needs more tension to keep it straight. For wider gutters, say 6-inch, just bump the width to 6: aluminum becomes ~5.7 pounds, steel ~28.6 pounds. I’ve had customers tell me this formula is a game-changer, because they used to crank the brake as hard as they could “to keep the material tight” and ended up with 100 feet of stretched gutter that wouldn’t fit on a job.
Step 2: Adjust the Uncoiler Tension (For Brake-Controlled Machines) If your machine uses a brake on the uncoiler, you’ll adjust either the air pressure (most common) or the spring tension (on older, manual models) to hit your baseline. First, load the coil onto the uncoiler and lock it in place—don’t skip this, if the coil shifts during adjustment, your tension will be off. Then, feed 3 to 4 feet of material through the leveler and the first set of forming rolls, leaving the rest of the coil loose behind the uncoiler. Turn the machine on at a slow speed (10 to 15 feet per minute, not full speed—you want to be able to adjust on the fly) and watch two things: first, does the material feed smoothly without wrinkling? Second, when you stop the machine, does the end of the material at the uncoiler hang straight, or does it curl up (too much tension) or sag down (too little)? If it’s sagging, increase the brake pressure by 2 to 3 psi at a time, running the machine for a foot or two between adjustments. If it’s curling, decrease pressure by the same amount. For manual spring brakes, turn the adjustment nut a quarter turn at a time—small moves make a big difference here. Once you hit the baseline, run 10 to 15 feet of gutter, then measure the thickness of the middle of the gutter panel with a micrometer. If it’s thinner than the original coil (check the edge of the unrun coil), you have too much tension—back it off a little. If it’s the same thickness, you’re good.
Step 3: Calibrate the Dancer Arm (For Automated Dancer-Equipped Machines) If you’re running an industrial-grade machine with a dancer arm, this process is even more precise, because the arm is designed to maintain consistent tension across long runs. First, locate the tension setting on your machine’s HMI or control panel—most are labeled by percentage of maximum tension, not raw pounds. For gutters, you’ll almost never go above 25% of the machine’s maximum tension setting, because gutters are thin, flexible and too much tension will cause stretching. Set the percentage to 10% as your starting point, then run the machine at slow speed. Watch the dancer arm—if it moves all the way up (signaling too much tension) or all the way down (too little), adjust the setting in 2% increments until the arm stays in the middle of its travel. That middle position is the sweet spot, because it means the arm has room to adjust for small fluctuations in coil thickness or speed. One tip I give here: if you’re running a long run (more than 500 feet), stop every 100 feet and check the dancer arm position and panel thickness. Aluminum can work-harden over long runs, especially at speed, so you might need to bump the tension up by 1 to 2% halfway through to keep it straight.
Step 4: Fine-Tune for Speed and Forming Die Alignment Once your baseline is set, you’ll need to adjust for production speed and die condition. This is where experience comes in, but there are rules of thumb I share: the faster you run the machine, the higher the tension you need. At 20 feet per minute, you might be at your baseline, but at 60 feet per minute, you might need to add 10 to 15% more tension. Why? Because when material moves faster, it has less time to settle into the forming dies, and a little extra tension keeps it tight against the dies, resulting in sharper, more consistent bends. Just don’t go overboard—too much tension at high speed causes way more stretching than at low speed, because the material can’t “give” as it feeds.
Also, if you’ve recently replaced forming dies or adjusted the gap between them, you’ll need to tweak tension. If your dies are too tight, they’ll pinch the material, which feels like too much tension. If they’re too loose, the material will shift as it forms, which feels like too little tension. A quick test: run a 2-foot piece of gutter at your baseline tension, then check the bend angles with a gauge. If the angles are off, adjust the die gap, not the tension—changing tension won’t fix a misaligned die.
Now, let’s talk about the most common mistakes I see, because even if you follow the steps above, it’s easy to slip up. First, not accounting for coil diameter. As you use up a coil, the diameter gets smaller, and the tension from the uncoiler changes—most people just leave the setting the same for the whole coil, which is wrong. For brake-controlled machines, every time the coil diameter drops by 10 inches, you should increase the brake pressure by 1 to 2 psi. For dancer systems, the machine should have an automatic diameter adjustment feature, but it’s worth checking that it’s calibrated correctly every month. Second, ignoring material edge condition. If your coil has burrs or rough edges from being cut, it will catch in the leveler or forming rolls, causing sudden tension spikes that lead to wrinkles. Always check the edges of your coil before loading it onto the machine—if they’re rough, run them through a edge deburrer first, or adjust your tension to be 5% lower to compensate. Third, running at full speed right away. I’ve had customers call me in a panic because their machine ate a full coil, and when I show up, they ran at 80 feet per minute from the start, without adjusting tension. Slow down, set the baseline, then bump speed up gradually.
Last, if you’re still struggling, it’s worth doing a tension test. Most of my customers have a simple handheld tension meter, a $200 tool that measures the pulling force on a short strip of material. To use it: cut a 1-foot piece of material, hold one end, feed the other through the machine at slow speed, pull the meter parallel to the feed direction, and read the number. If it doesn’t match your baseline, adjust accordingly. It’s a simple tool, but it eliminates all guesswork.

At the end of the day, adjusting material tension isn’t rocket science—it’s a mix of knowing your material, your machine, and small, incremental adjustments. I’ve seen new fabricators get this wrong on their first run, then nail it on the third, because they follow these steps instead of cranking the brake as hard as they can. If you’re looking to upgrade your gutter roll forming machine or need help troubleshooting tension issues for your current line, I work with teams of all sizes to get their production running smoothly. We don’t just sell machines—we provide the training and support to make sure you can do this adjustment (and every other critical task) with confidence. Whether you’re a small contractor just starting out or a large manufacturing facility looking to reduce waste and improve quality, we’re here to help you get consistent, professional gutters every time.
Gutter Roll Forming Machine Reference
- George, T. (2019). Roll Forming Technology: Principles and Practice. Industrial Press.
- Smith, L. (2021). Tension Control in Metal Forming Applications. Journal of Manufacturing Processes, Vol. 67, pp. 412-425.
- Miller, J. (2022). Practical Guide to Gutter Roll Forming Machine Operation and Maintenance. Fabricator Magazine, Vol. 38, No. 5, pp. 22-27.
Hanghzou IUWON Technology Co., Ltd.
Hanghzou IUWON Technology Co., Ltd. is one of the most professional gutter roll forming machine manufacturers and suppliers in China. Please feel free to buy high quality gutter roll forming machine made in China here from our factory. For price consultation, contact us.
Address: No.755, Xintangtou Village, Xinjie Street, Xiaoshan District, Hangzhou, Zhejiang
E-mail: sales@iuwon.com
WebSite: https://www.iuwonforming.com/
