Hey there, fellow network folks! If you’re part of the crew that rolls out or maintains fiber optic infrastructure, you’ve probably asked yourself: “How do I keep direct burial fiber cables from turning into a headache down the line?” As someone who’s been supplying direct burial optical fiber cable for over 8 years now— I’ve seen every avoidable mistake out there. From contractors digging up the wrong spot to small maintenance blips that snowball into full-on outages. This post’s gonna break down exactly what you need to do to keep those buried fibers running smooth, no fancy jargon, just real-world tips I’ve picked up working with installers and network teams. Direct Burial Optical Fiber Cable

First off, let’s get one thing straight: direct burial cables aren’t “set it and forget it” items. A lot of folks think because they’re buried underground, they don’t need regular love—total myth. The ground’s a harsh place. You’ve got shifting soil, tree roots chewing through jackets, tiny critters making homes, even nearby construction that can nudge or slice the cable without anyone noticing. I’ve had a customer call me panicking because their network went down overnight, and it turned out a new fence post installer hit the cable 3 feet deep, not the 4 feet they marked. Small stuff adds up, so consistent maintenance is non-negotiable.
Let’s start with the most basic (and most often skipped) step: regular cable route inspections. Not just a once-a-year drive-by—we’re talking targeted checks, depending on your terrain. For suburban areas, where folks are putting in new patios, tree plants, or sprinkler systems, every 6 months is perfect. For rural areas with heavy farming or construction (like new road builds), bump that up to every 3 months. How do you do it without digging up half the yard? Use a cable locator. Yeah, they’re not free, but way cheaper than fixing a full outage. Modern locators are super user-friendly—even a new tech can pick one up and find the cable in 5 minutes. Just make sure you mark the route with spray paint or stake flags when you install it—we always include custom route maps with every cable supply order, so you don’t have to guess where it goes. Last year, I sent a set of direct burial cables to a rural ISP in Ohio, and they used our route map to do a pre-construction check before a local farmer put in a new pivot irrigation system—saved them $12k in outage repair costs. That’s the kind of win we love to see.
Next up: soil and terrain checks. This is the part a lot of new installers (and even some old hands) sleep on. Not all dirt is the same. If you’ve got rocky, shifting soil—like in mountainous areas or places with heavy clay that freezes and thaws every year—you’re gonna have issues. Those freeze-thaw cycles create voids that can pull or kink the cable, especially if it’s run under a driveway or road. Then there’s sandy soil, which lets moisture seep in way easier. And don’t even get me started on areas with aggressive tree roots. Oak, maple, and willow roots grow fast, and they can puncture the cable jacket in a matter of years. So what’s the maintenance here? For high-risk terrain, do a soil check every 12 months. Look for signs of shifting (like cracks in nearby pavement, or soil settling along the route). For root-heavy areas, every 2 years, dig a small test trench (1 foot deep, away from existing structures) to check if roots are getting close. If you spot a root problem early, you can re-route a small section or add a root barrier (we sell those as add-ons for our direct burial cables, fyi—they’re a game-changer). I once had a customer in Texas with a grove of mesquite trees—they added root barriers to 300 feet of our cable route, and they haven’t had a root puncture in 5 years. Before that, they were fixing a breach every other year.
Then there’s handling moisture and environmental damage. Direct burial cables are designed to be underground, but that doesn’t mean they’re waterproof forever. Moisture gets in through tiny jacket cuts, splices, or even loose connectors, and that can kill the fiber strands. How do you spot it? During those route inspections, check any splice points you’ve installed (they’re usually in underground enclosures marked with bright caps). If you see condensation or dampness in the enclosure, drain it immediately and replace the enclosure’s seal. For cable jackets, look for small cracks, tears, or fraying—especially in areas that take heavy traffic (like under a driveway or where ATVs drive over). If you spot a small tear, don’t wait—use a industrial-grade tape repair kit (we recommend a specific brand that works best with our cables) and wrap it tightly. If it’s a bigger tear, you might have to splice in a new section of cable. Moisture isn’t just from water—rodents can also chew through jackets (mice, rats, even ground squirrels). I’ve seen a whole section of cable chewed up by a family of gophers in Oregon—they went right through the outer jacket and the fiber core. To prevent that, check for rodent burrows along the route every 6 months. If you see them, you can use non-toxic repellents (no poison, that can hurt other wildlife) or add a thin layer of steel tape around the cable in high-risk areas. Way better than fixing a full rodent-related outage.
Now, splice maintenance—this is a big one that a lot of teams overlook. Splicing is when you connect two lengths of cable, right? It’s necessary if you’re running a long route, but if the splice isn’t sealed or maintained, it’s a failure waiting to happen. For direct burial splices, they’re usually stored in a hard plastic or metal enclosure buried a few inches deep. Every year, dig up a few of these enclosures (don’t do all at once, pick a sample) to check the splice. Look for dirt, water, or corrosion inside. If you see any, clean it out with isopropyl alcohol, dry it completely, and re-seal the enclosure. Also, check the splice fusion points—make sure the fiber strands aren’t loose or damaged. A loose splice can cause signal loss, which leads to slow internet or dropped calls. I had a customer in Florida who skipped splice checks for 3 years—they had 7 bad splices that caused intermittent outages, and it took them 2 weeks to track all of them down. A 15-minute annual check would’ve saved them tons of downtime.
Wait, what about seasonal maintenance? That’s often forgotten too. Different seasons bring different threats. Winter: freeze-thaw cycles we talked about earlier, plus heavy snow plows that can scrape the ground and nick cable jackets. If you’re in a cold climate, after the first big freeze, walk the route (or send a tech) to look for signs of plow damage. Spring: rainy season, so more moisture and possible flooding. If your route is in a low-lying area, check if water has pooled over the cable—if yes, you might need to grade the soil to redirect water. Summer: heat and drought, which makes soil shift, and tree roots grow even faster. That’s when those root checks come in. Fall: leaf litter and debris can retain moisture, so make sure to clear any buildup over the route to prevent mold or pest issues.
Also, let’s talk about documentation—this is maintenance, too. I can’t tell you how many times a team has called me because they can’t find their old installation specs. With our direct burial cable supply, we give you a full installation packet with exact route maps, depth specifications, splice point locations, and cable type (single-mode vs multi-mode). Update that packet every time you do a repair or re-route a section. If you have a fire or new construction nearby, pull that packet first—don’t just dig blindly. That’s how gas lines get hit, and that’s how fiber cables get sliced by accident. Good docs cut down maintenance time by 50%, no cap.
Now, let’s get real: what are the most common maintenance mistakes I see? First, not calibrating your cable locator. A $500 locator is useless if it’s not set to the right frequency for your direct burial cable. I’ve seen installers use a locator set for aerial cable on underground cable, and they couldn’t find it when they needed to. Second, skipping the test after a repair. If you patch a tear or re-splice a section, always run a signal test (we can send over a quick guide for that, no fancy equipment needed) to make sure the fiber is working before you cover it back up. Third, waiting too long to fix small issues. A tiny crack in a cable jacket might not cause a problem today, but in a year, it’ll let in water, and you’ll have a full outage. Fourth, not training your maintenance team. If your techs don’t know how to use a cable locator or check splice enclosures, they’re gonna miss stuff. We offer free 30-minute training calls for all our direct burial cable customers—just ask.
Wait, can we talk about when to call for back-up? No one knows every nuance of every cable, right? If you spot a major tear, a big root infestation, or signal loss that you can’t figure out, don’t try to tackle it alone. We work with a network of local installers who specialize in direct burial cable maintenance—we can connect you to a reliable team in your area, no hidden fees. Just reach out, and we’ll point you in the right direction.
Let me wrap this up with a quick recap so you don’t have to scroll back: 1) Inspect routes every 3-6 months with a calibrated locator. 2) Check soil, roots, and terrain annually (more for high-risk areas). 3) Seal moisture and rodent damage immediately with proper repair kits. 4) Do annual splice enclosure checks and re-seal if needed. 5) Adjust maintenance for each season (winter plows, spring floods, etc.). 6) Keep accurate, up-to-date installation docs. 7) Don’t skip small fixes—they turn into big problems fast.
Look, as a direct burial cable supplier, our job isn’t just to ship cable and disappear. We want our customers’ networks to run 24/7, no outages, no headaches. That’s why we’ve got all the extra stuff—custom route maps, repair kits, training calls, even connections to local maintenance teams. If you’re tired of dealing with avoidable cable issues, or you’re looking to upgrade your current direct burial cable setup, hit us up to chat. We can answer all your questions, walk through maintenance plans tailored to your specific terrain, and get you set up with the right cable for your needs. No pushy sales stuff, just honest help for network teams.
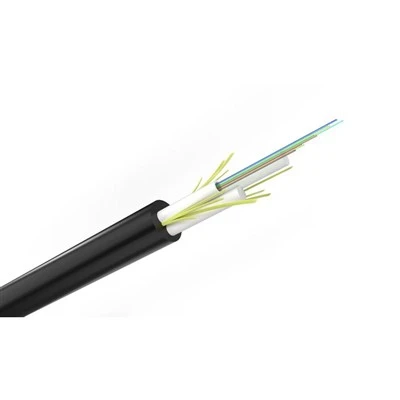
At the end of the day, direct burial fiber doesn’t have to be a maintenance nightmare. A consistent, smart maintenance plan goes a long way in keeping your network strong for years. Skip the rushed checks, invest in the small stuff, and don’t be afraid to ask for help when you need it. We’re here for you.
Indoor Optical Fiber Cable References:
- Fiber Optic Association. (2022). Direct Burial Fiber Cable Installation and Maintenance Guidelines. FOA Publications.
- Telecommunications Industry Association. (2021). TIA-598-C: Optical Fiber Cable Color Coding and Maintenance Best Practices. TIA Standards.
- Underground Infrastructure Research Initiative. (2023). Environmental Stressors on Buried Telecommunications Cables. UIRI Technical Report.
- National Exchange Carrier Association. (2022). Best Practices for Fiber Optic Splice and Enclosure Maintenance. NECA Industry Brief.
- US Department of Agriculture. (2021). Agricultural Buried Fiber Cable Maintenance for Rural Areas. USDA Rural Utilities Service Publication.
Hangzhou Lin’an Kexin Optical Cable Co., Ltd.
As one of the most professional direct burial optical fiber cable manufacturers and suppliers in China, we’re featured by quality products and good price. Please rest assured to wholesale discount direct burial optical fiber cable made in China here and get pricelist from our factory. Customized orders are welcome.
Address: No. 28 Linglong Street,Lin’an Area, Hangzhou City, Zhejiang Province, China
E-mail: sales@kexincable.com
WebSite: https://www.kexincable.com/
